
web-04 评论区部署
评论区部署
butterfly主题内置了很多评论系统,甚至可以同时部署两个评论系统
这里因为twikoo可以部署到vercel上,所以我就直接部署twikoo了
- 先到_config.butterfly.yml里启用评论系统这里指定js版本要等评论系统部署到vercel以后同步后端版本,如果版本不同后台会提示
1
2
3
4
5
6
7
8
9
10
11
12
13
14
15
16
17
18
19
20
comments:
# Up to two comments system, the first will be shown as default
# Choose: Disqus/Disqusjs/Livere/Gitalk/Valine/Waline/Utterances/Facebook Comments/Twikoo/Giscus/Remark42/Artalk
use: # Valine,Disqus
- Twikoo
text: true # Display the comment name next to the button
# lazyload: The comment system will be load when comment element enters the browser's viewport.
# If you set it to true, the comment count will be invalid
lazyload: true
count: true # Display comment count in post's top_img
card_post_count: true # Display comment count in Home Page
# Twikoo
# https://github.com/imaegoo/twikoo
twikoo:
js: https://gcore.jsdelivr.net/npm/[email protected]/dist/twikoo.all.min.js
envId: https://twikoo.godke.blog
region:
visitor: false # 開啟 visitor 後,文章頁的訪問人數將改為 Twikoo 提供,而不是 不蒜子
option:
envId是部署的域名,vercel部署的默认域名是*.vercel.app,但是这个被墙了,需要后续处理 - vercel部署
- 申请 MongoDB 账号
- 创建免费 MongoDB 数据库,区域推荐选择
AWS / N. Virginia (us-east-1) - 在 Database Access 页面点击 Add New Database User 创建数据库用户,Authentication Method 选 Password,在 Password Authentication 下设置数据库用户名和密码,用户名和密码可包含数字和大小写字母,请勿包含特殊符号。点击 Database User Privileges 下方的 Add Built In Role,Select Role 选择 Atlas Admin,最后点击 Add User

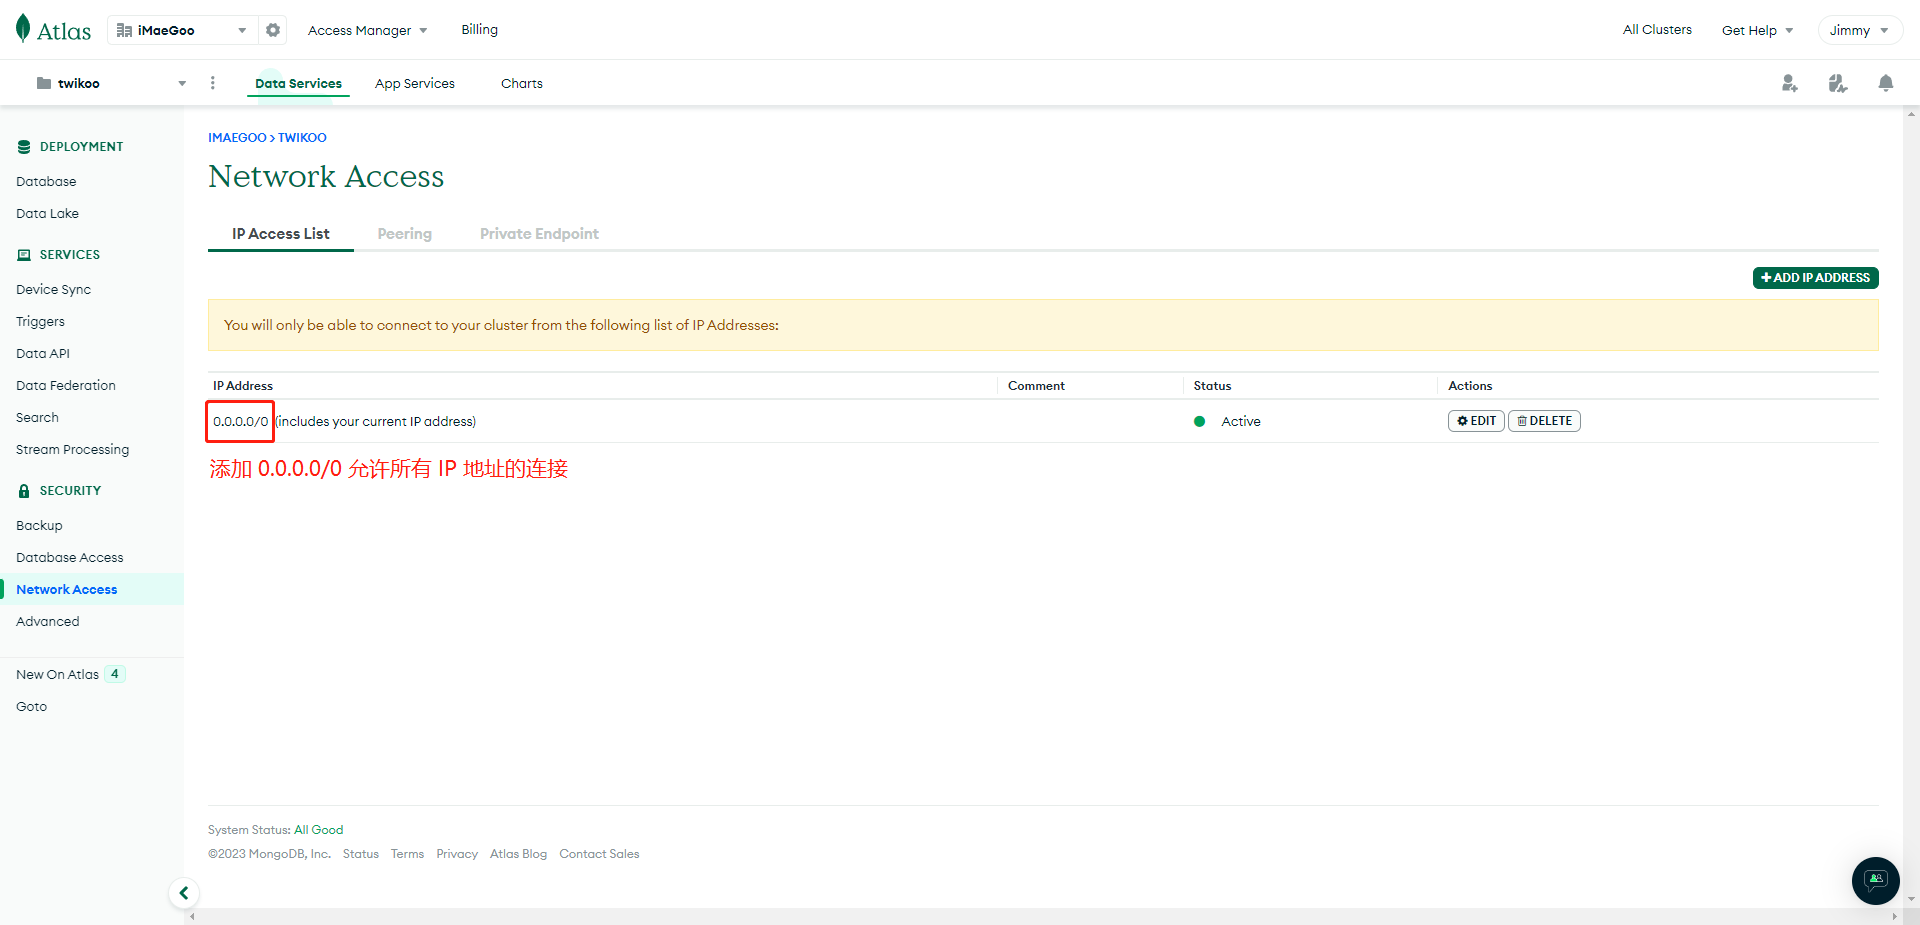
4. 在 Network Access 页面点击 Add IP Address,Access List Entry 输入 0.0.0.0/0(允许所有 IP 地址的连接),点击 Confirm
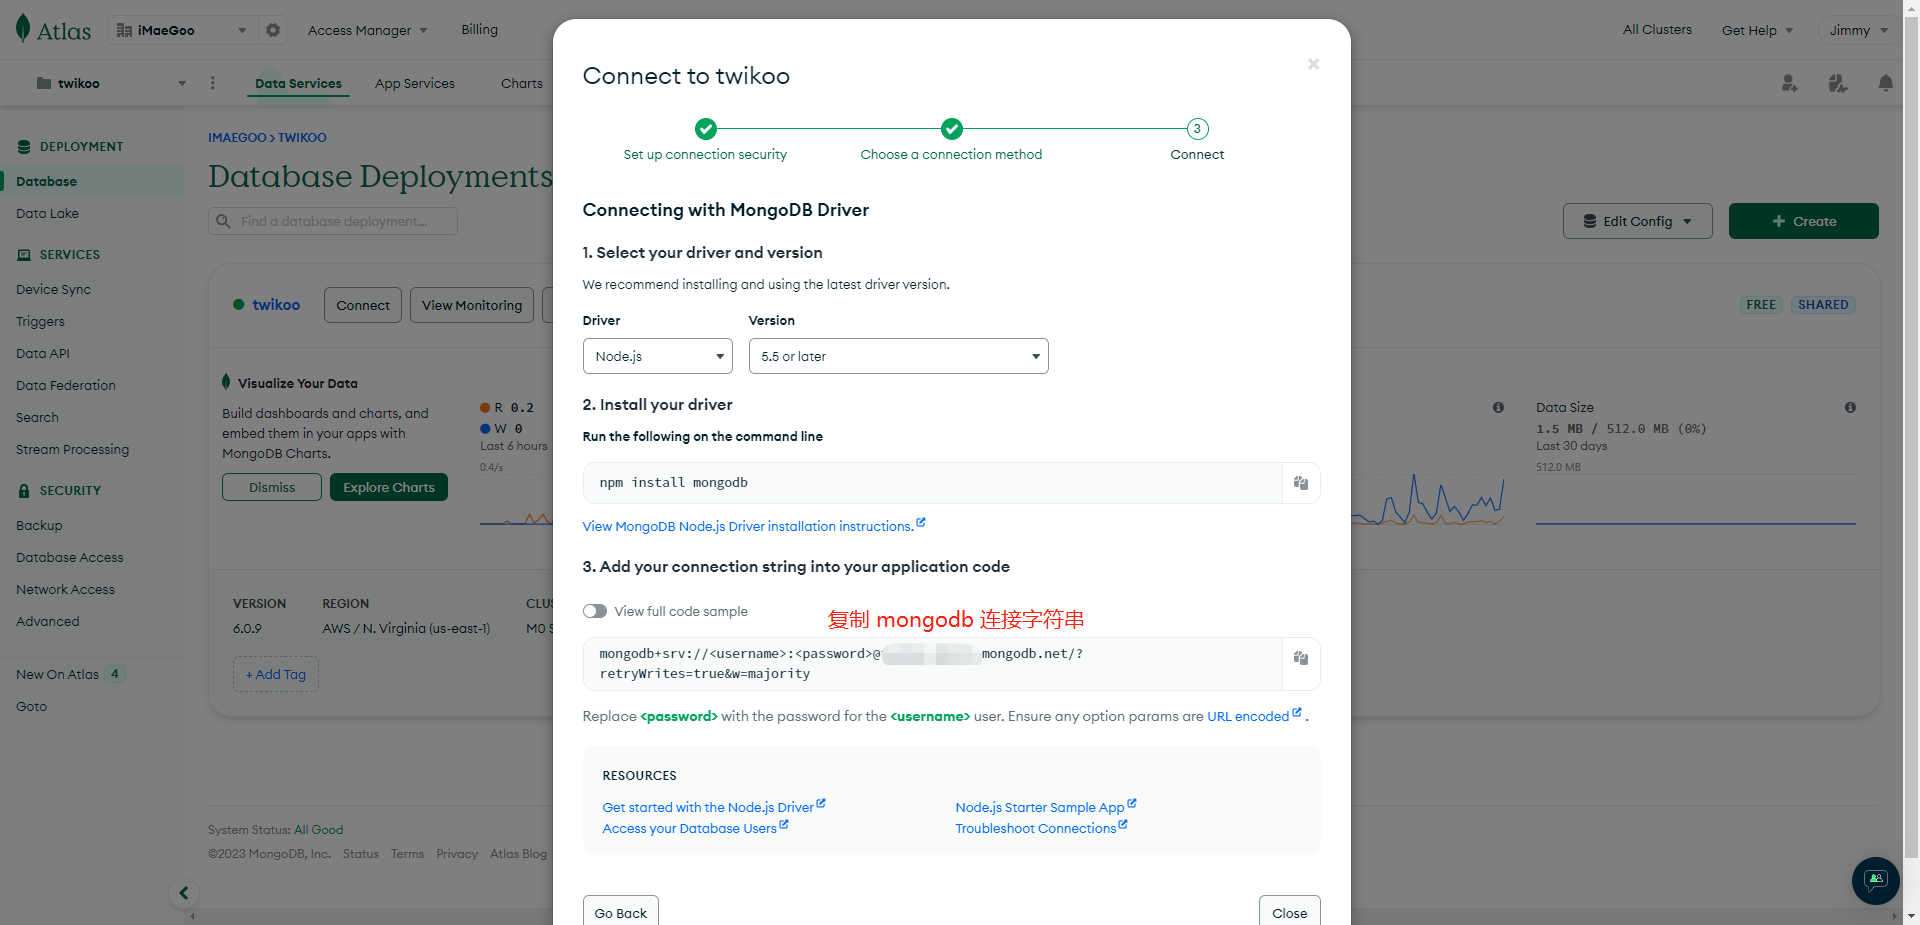
- 在 Database 页面点击 Connect,连接方式选择 Drivers,并记录数据库连接字符串,请将连接字符串中的
<username>:<password>修改为刚刚创建的数据库用户名:密码
- 申请 Vercel 账号
- 点击以下按钮将 Twikoo 一键部署到 Vercel
- 进入 Settings - Environment Variables,添加环境变量
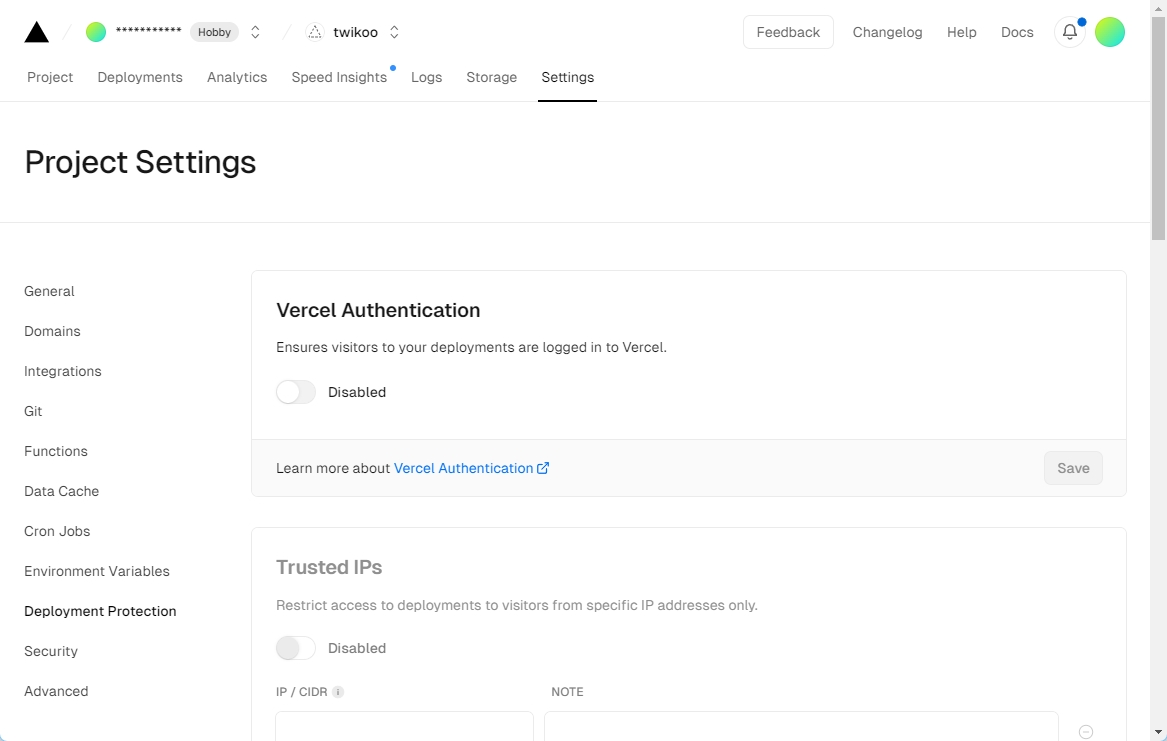
MONGODB_URI,值为前面记录的数据库连接字符串 - 进入 Settings - Deployment Protection,设置 Vercel Authentication 为 Disabled,并 Save
- 进入 Deployments , 然后在任意一项后面点击更多(三个点) , 然后点击 Redeploy , 最后点击下面的 Redeploy
- 进入 Overview,点击 Domains 下方的链接,如果环境配置正确,可以看到 “Twikoo 云函数运行正常” 的提示
- Vercel Domains(包含
https://前缀,例如https://xxx.vercel.app)即为您的envId
前端配置
现在重启项目,应该就能看到评论区被加载出来了,在输入框下面可以看到一个小齿轮
点击小齿轮进入后台,这时最好开一下代理,因为现在使用的是vercel的静态服务,而vercel被墙了
- 设置一个后台密码
- 配置一些通用设置,按照提示来就行,也可以开启插件里的图片功能,需要一个图床的token
评论输入提醒
只需在custom.css内添加
1 | /* 设置文字内容 :nth-child(1)的作用是选择第几个 */ |
邮件回复部署
邮件回复虽然支持的邮箱很多,但是问题也很多,比如QQ邮箱会认为你在发垃圾邮件,返回一个550报错,完全用不了
最好使用gmail,容忍度比较高
开通smtp
谷歌Gmail邮箱开启SMTP/IMAP服务流程
谷歌邮箱机制是IMAP一旦开通,SMTP也就自动开通了,设置里没有没关系,不用管它
获取谷歌应用专用密码:
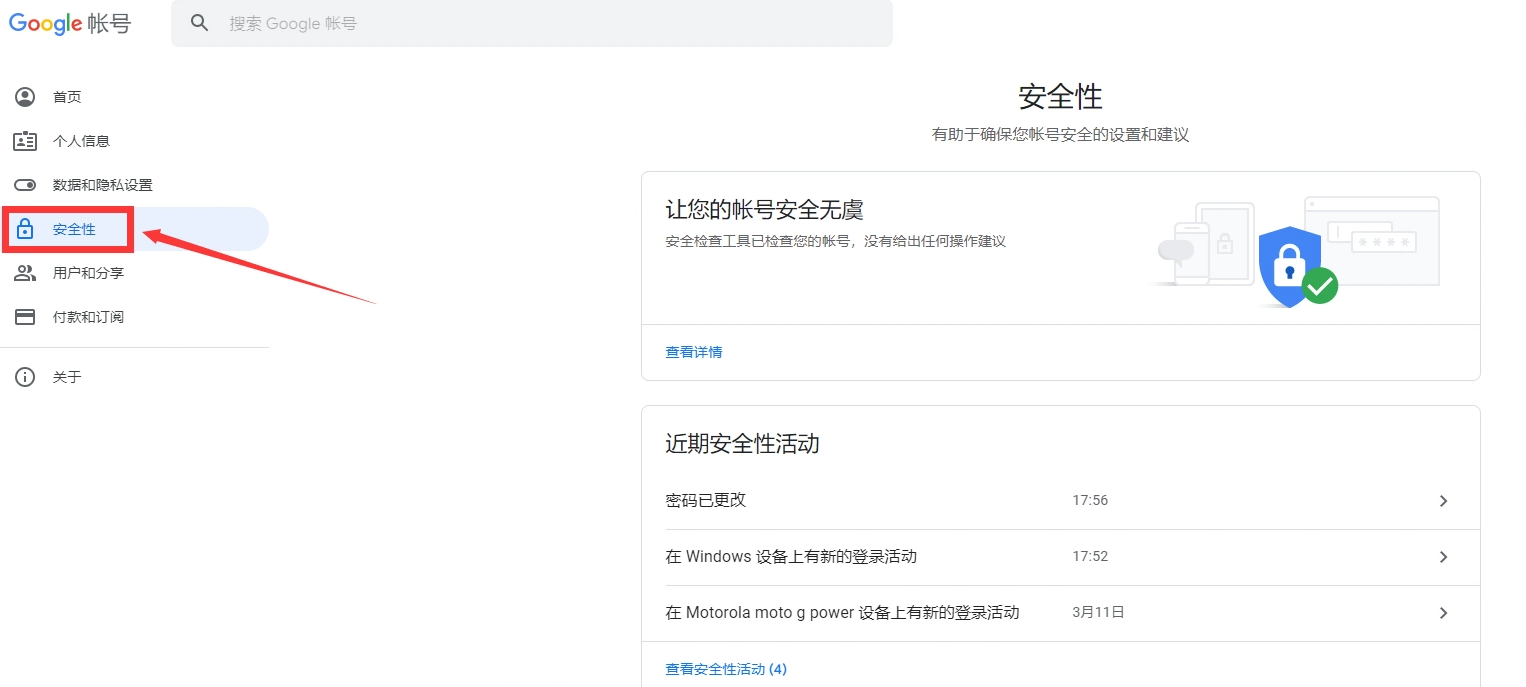
在开通了IMAP服务,还需要向谷歌获取应用密码才可以使用,此时我们访问谷歌账号页面:https://myaccount.google.com/ 在左侧的菜单下,选择安全性
注意!我们要获取应用专用密码就必须要开启两步验证,否则应用专用密码的选项不会显示出来。
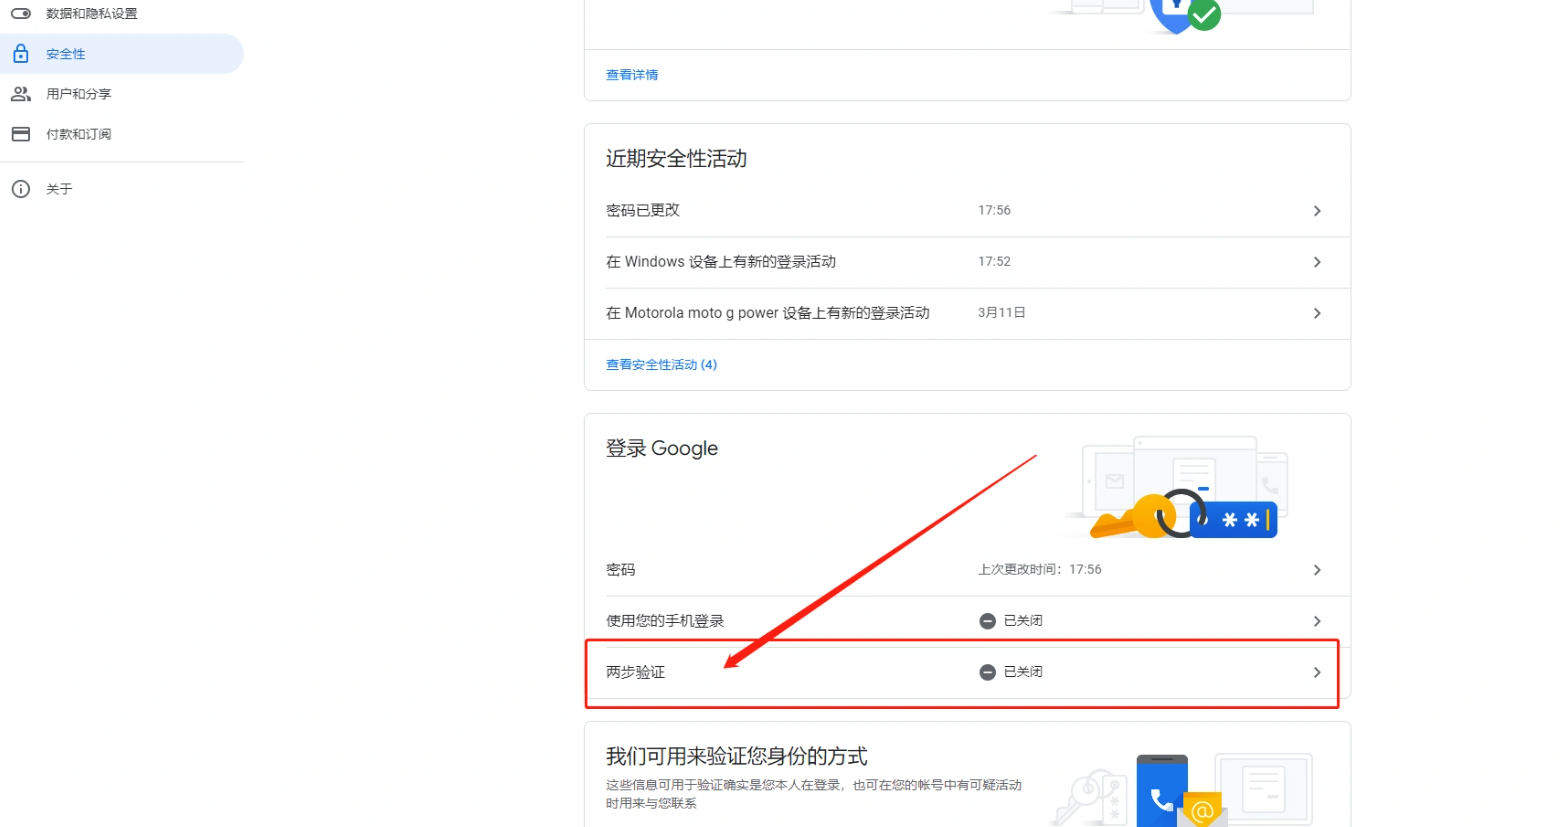
按照google的要求开通两步验证即可,过程中需要绑定个手机号,以下是开通后的界面:
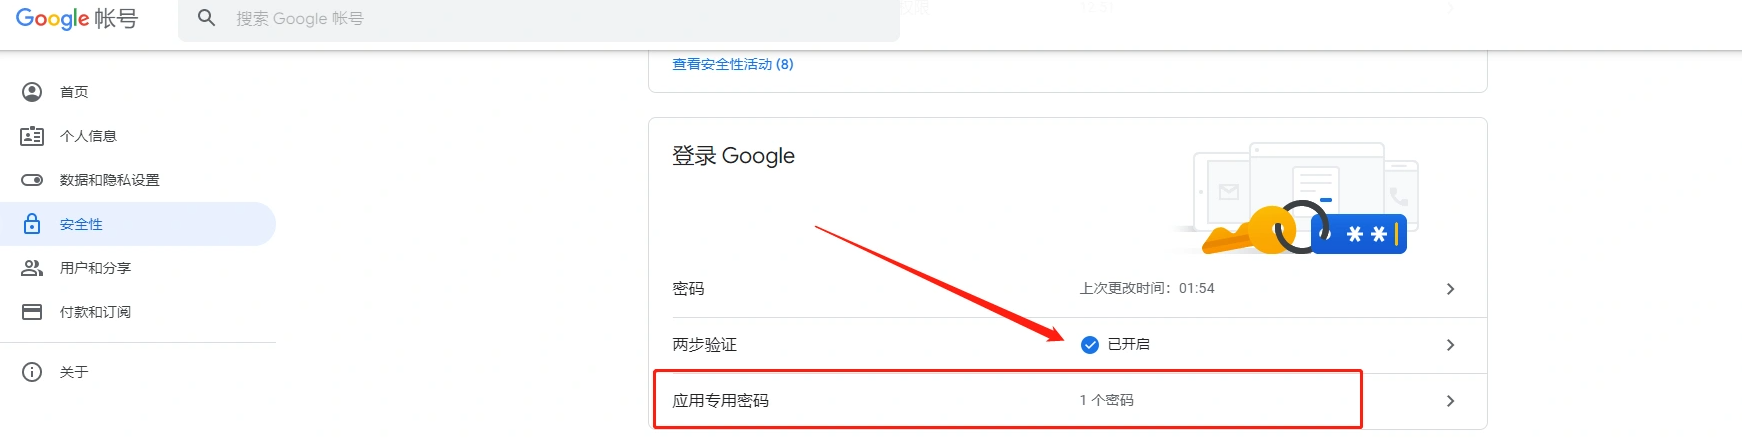
开通了之后,点击两步验证的选项,应用专用密码功能出现了,我们需要在此出新生成个密码
生成后会得到一段独立密码,复制保存好,如果忘记就只能删除 重新生成。
配置邮件回复
协议端口说明:
以下是谷歌Gmail邮箱所对应的端口 以及 我们需要的SMTP服务器地址。参考下表:
| 介绍 | 详细 |
|---|---|
| 接收邮件 (IMAP) 服务器 | imap.gmail.com要求 SSL:是端口:993 |
| 发送邮件 (SMTP) 服务器 | smtp.gmail.com要求 SSL:是要求 TLS:是(如适用)使用身份验证:是SSL 端口:465TLS/STARTTLS 端口:587 |
| 完整名称或显示名称 | 您的姓名 |
| 帐号名、用户名或电子邮件地址 | 您的完整电子邮件地址 |
| 密码 | 您的 Gmail 密码/应用专用密码 |
| 之后来到评论系统后台,选择邮件通知选项,按照提示填入即可 |
设置自定义回复模板
有两个模板,不过我喜欢直接两个用一样的,一个是提醒站长,一个是提醒其他人
提示信息看字符串改就行,匹配字段支持
${SITE_URL}, ${SITE_NAME}, ${PARENT_NICK}, ${PARENT_COMMENT}, ${NICK}, ${COMMENT}, ${POST_URL}, ${IMG}, ${PARENT_IMG}
另外可以自定义的也就最前面的background和background-image了,一个是整体的颜色,格式是rgba,一个是头图,改成自己的url就行
1 | <div class="page flex-col"><div class="box_3 flex-col" style=" display: flex; position: relative; width: 100%; height: 206px; background: #aaeeffbb; top: 0; left: 0; justify-content: center;"><div class="section_1 flex-col" style=" background-image: url("https://picbed.godke.blog/img/ATRIhead.jpg"); position: absolute; width: 152px; height: 152px; display: flex; top: 130px; background-size: cover;"></div></div><div class="box_4 flex-col" style=" margin-top: 92px; display: flex; flex-direction: column; align-items: center;"><div class="text-group_5 flex-col justify-between" style=" display: flex; flex-direction: column; align-items: center; margin: 0 20px;"><span class="text_1" style=" font-size: 26px; font-family: PingFang-SC-Bold, PingFang-SC; font-weight: bold; color: #000000; line-height: 37px; text-align: center;">嘿!你在 ${SITE_NAME} 中收到一条新回复。</span><span class="text_2" style=" font-size: 16px; font-family: PingFang-SC-Bold, PingFang-SC; font-weight: bold; color: #00000030; line-height: 22px; margin-top: 21px; text-align: center;">你之前的评论 在 ${SITE_NAME} 中收到来自 ${NICK} 的回复</span></div><div class="box_2 flex-row" style=" margin: 0 20px; min-height: 128px; background: #F7F7F7; border-radius: 12px; margin-top: 34px; display: flex; flex-direction: column; align-items: flex-start; padding: 32px 16px; width: calc(100% - 40px);"><div class="text-wrapper_4 flex-col justify-between" style=" display: flex; flex-direction: column; margin-left: 30px; margin-bottom: 16px;"><span class="text_3" style=" height: 22px; font-size: 16px; font-family: PingFang-SC-Bold, PingFang-SC; font-weight: bold; color: #C5343E; line-height: 22px;">${PARENT_NICK}</span><span class="text_4" style=" margin-top: 6px; margin-right: 22px; font-size: 16px; font-family: PingFangSC-Regular, PingFang SC; font-weight: 400; color: #000000; line-height: 22px;">${PARENT_COMMENT}</span></div><hr style=" display: flex; position: relative; border: 1px dashed #ef859d2e; box-sizing: content-box; height: 0px; overflow: visible; width: 100%;"><div class="text-wrapper_4 flex-col justify-between" style=" display: flex; flex-direction: column; margin-left: 30px;"><hr><span class="text_3" style=" height: 22px; font-size: 16px; font-family: PingFang-SC-Bold, PingFang-SC; font-weight: bold; color: #C5343E; line-height: 22px;">${NICK}</span><span class="text_4" style=" margin-top: 6px; margin-right: 22px; font-size: 16px; font-family: PingFangSC-Regular, PingFang SC; font-weight: 400; color: #000000; line-height: 22px;">${COMMENT}</span></div><a class="text-wrapper_2 flex-col" style=" min-width: 106px; height: 38px; background: #ef859d38; border-radius: 32px; display: flex; align-items: center; justify-content: center; text-decoration: none; margin: auto; margin-top: 32px;" href="${POST_URL}"><span class="text_5" style=" color: #DB214B;">查看详情</span></a></div><div class="text-group_6 flex-col justify-between" style=" display: flex; flex-direction: column; align-items: center; margin-top: 34px;"><span class="text_6" style=" height: 17px; font-size: 12px; font-family: PingFangSC-Regular, PingFang SC; font-weight: 400; color: #00000045; line-height: 17px;">此邮件由评论服务自动发出,直接回复无效。</span><a class="text_7" style=" height: 17px; font-size: 12px; font-family: PingFangSC-Regular, PingFang SC; font-weight: 400; color: #DB214B; line-height: 17px; margin-top: 6px; text-decoration: none;" href="${SITE_URL}">前往博客</a></div></div></div> |